
Classify with a swipe
- Open Trips and choose the month.
- Select Unclassified to focus on trips needing review.
- Swipe a trip far enough to the right for Business, or to the left for Personal, then release.
The classification saves immediately and a confirmation appears. If the trip no longer matches your filter, it leaves that list. Select All to find it again.
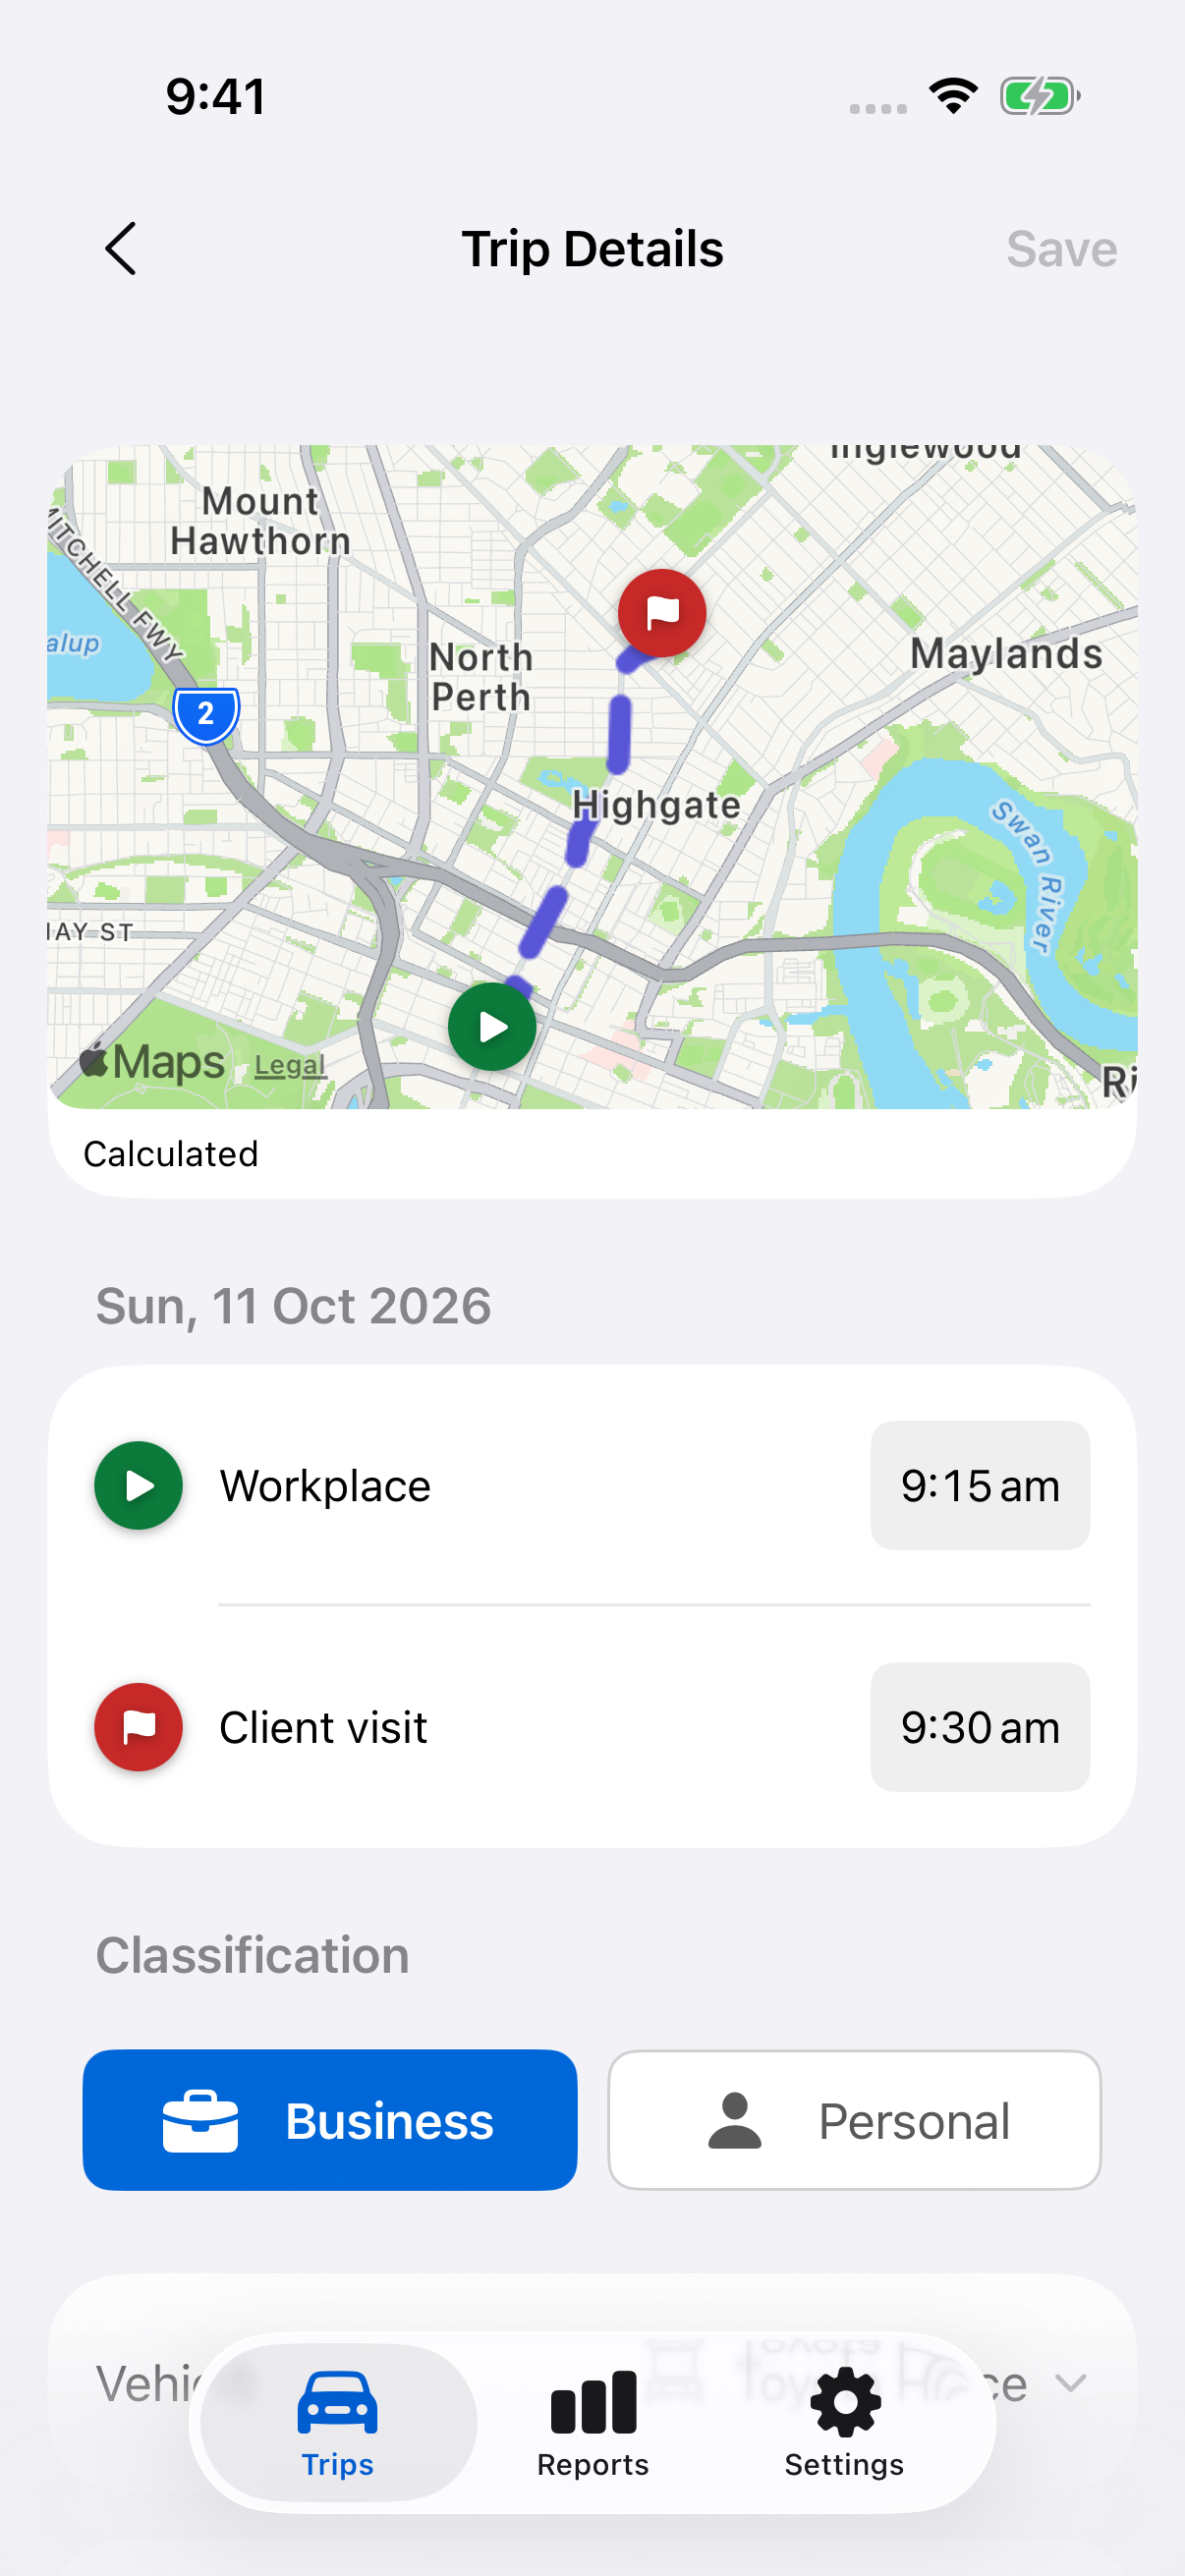
Classify in Trip Details
- Tap the trip.
- Choose Business or Personal.
- Tap Save at the top right.
Use the same steps to correct a classification. Add a note explaining the trip’s purpose where needed; the Business label alone does not explain why you travelled.
Review automatic classifications
Automation rules can classify automatically started trips when they finish. Check Classified by and open Applied rules in Trip Details to understand the result.
A classification you choose manually takes precedence over a rule. You can still change it later. Updating a rule does not reclassify saved trips, so review existing entries separately.
Classifications affect report totals and filters. Check them before exporting.
Still need help?
If you can’t find what you’re looking for, we’re here to help.
Contact us